Introduction
What is Creative Automation ?
Creative automation is the process of scaling your graphic banner and content production by automatically generating banners with different size formats from data.
With Creative Automation, you can take your content production to the next level delivering assets quickly and in high-volume.
Benefits:- Achieve personalization at scale
- Shorter production cycles
- Less creative resources required
- More freedom for A/B testing
- better time-to-market
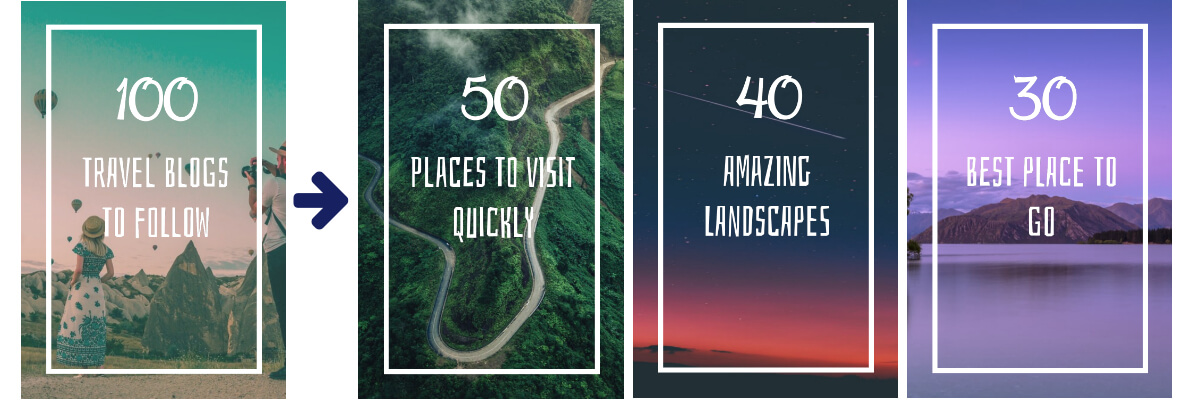
The 3 images on the right side have been generated from the first image on the left ("Travel Blogs To Follow" is one of our free template)
Pixelixe offers several ways to automate content production.
- Spreadsheet Automation
Generate content variations of a graphic template in bulk from Spreadsheet - Image Automation API
Generate content variations of a graphic template from API - Design Set Builder
Generate size and content variations of a graphic template from our UI
About Spreadsheet Automation
Bulk generation, no technical skills required
Our Spreadsheet Automation dashboard will let you convert each spreadsheet row into a brand new image banner. This feature is really convenient to generate in bulk variations of one specific graphic template for example. Every text, color and embedded image in a graphic can be modified from our Image Automation Engine.
Therefore, you can scale your content production really easily. By the way, you can export/import CSV files and therefore use your favorite Spreadsheet tool (Google Sheets, Excel, etc..)
By the way, all images in the example below have been generated from a Spreadsheet:
About Image Automation API
Automate Image and Banner Generation from your backend
Our Image Automation API will let you generate image and banner variations from any app or backend easily. The Spreadsheet Automation is based on the same core engine as the Image Automation API. The API can also be easily integrated into NoCode tools such as Bubble.io.
About Design Set Builder
Generate size variations of any graphic and update content all at once
Our Design Set Builder is perfect to create an entire set at once from our UI dashboard. Once you added the size variations in your set, generate content variations all at once.
Continue to understand how to run automation tasks by refering to the next section called "Getting Started - Commons" from the left menu.
Getting Started - Commons
How it works?
All Automation features in Pixelixe operate the same way (Design Set Builder, Image Automation API, Spreadsheet to images Automation). This is why we called this section "Getting Started - Commons" by the way.
- Create or choose a graphic template (social media, display or custom)
From scratch or from one of our templates. Every graphic created with our editor can be used as a template and auto-generates variants. - Prepare new content for your variants
Every text, color and embedded image in a graphic can be updated and replaced in new variations. Match your new content with your template element's name (text, image) to organize your assets with labels and ease the automation process. Every object/element within a template can be renamed to fit your data or existing labels. - Send it to our Automation engine and voila!
Our Creative Automation engine will do all the magic for you (scaling your content production and generating new assets).
Example:
Let's take an example to understand each step. The chosen graphic template on the left is one of our free templates available in our platform. The 3 other variants (on the right) have been automated using our Automation engine.
1 - Create or choose a graphic template
If you are new to Pixelixe and want to understand how to use our studio or choose a template, please refer to our Studio Help Center or tutorials.2 - Prepare new content for your variants
To automate the 3 variants on the right (screenshot above), we prepared 3 new background images and new headlines. Preparing and organizing content is easy when you have a dozen of banners to generate. But it can be a nightmare if you have thousands of asset to manage and organize.Ex - Our 3 prepared headlines:
- "50 Places to visit quickly"
- "40 Amazing landscapes"
- "30 Best places to go"
To ease the preparation of your asset, keep in mind you can rename the name of each element (object) in your graphic templates to easily match with your content labels and/or metadata.
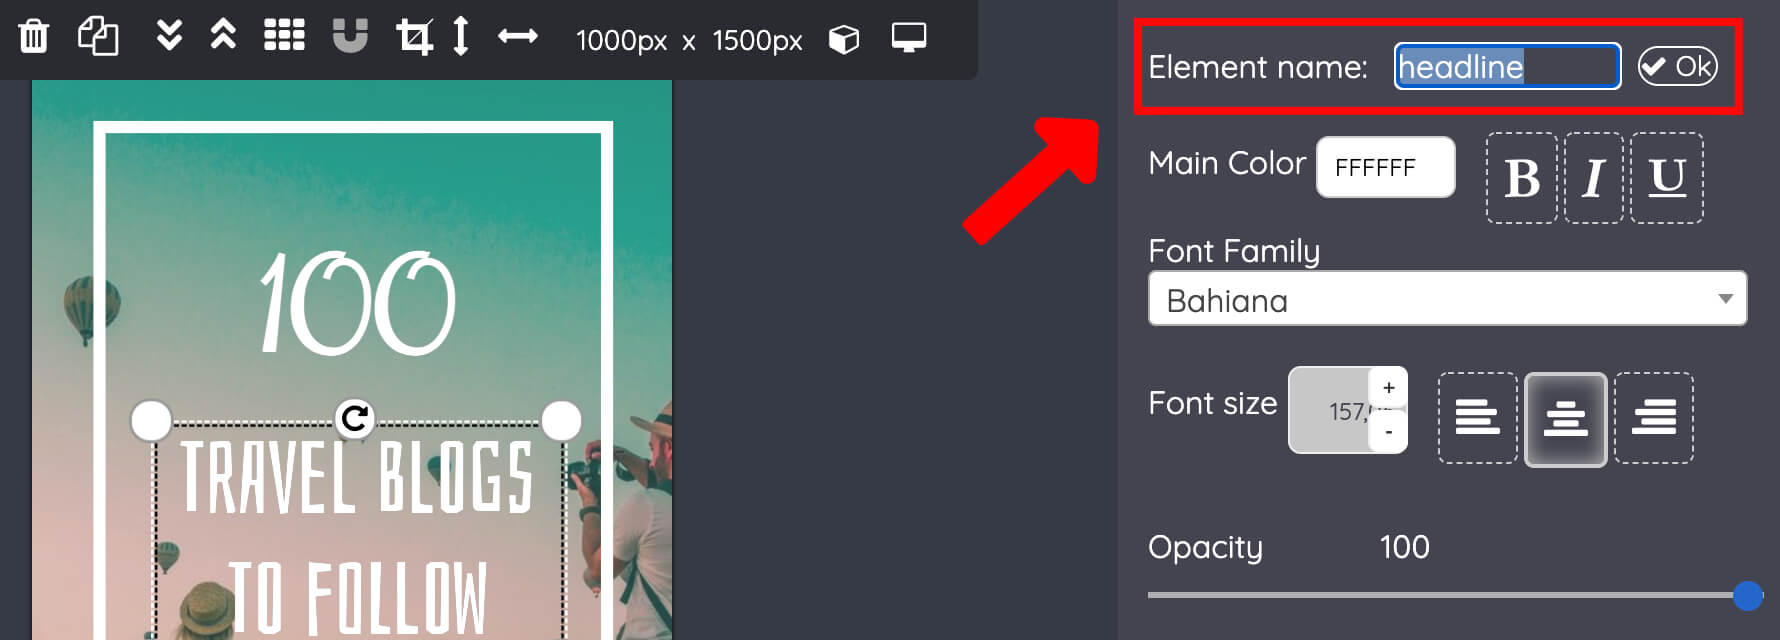
As you can see above, we renamed the "Travel Blogs to follow" label and chose the "headline" label.
This way, the "headline" element will be easy to identifiable in all UI dashboards within Pixelixe platform and also API
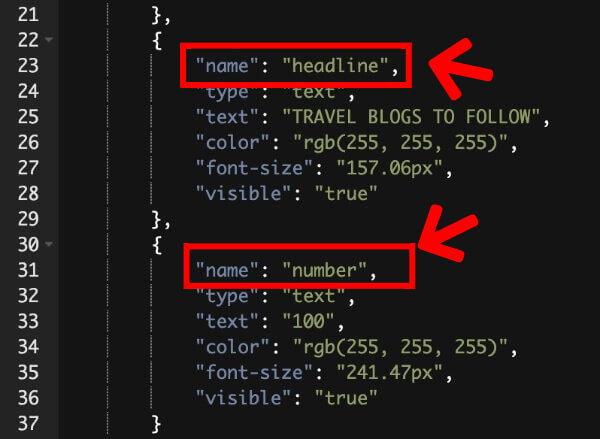
Indeed, whether you use the Spreadsheet Automation, the Image Automation API or the Design Set Builder tool, Pixelixe will automatically prepare the structure with elements to automate (color, text, images).
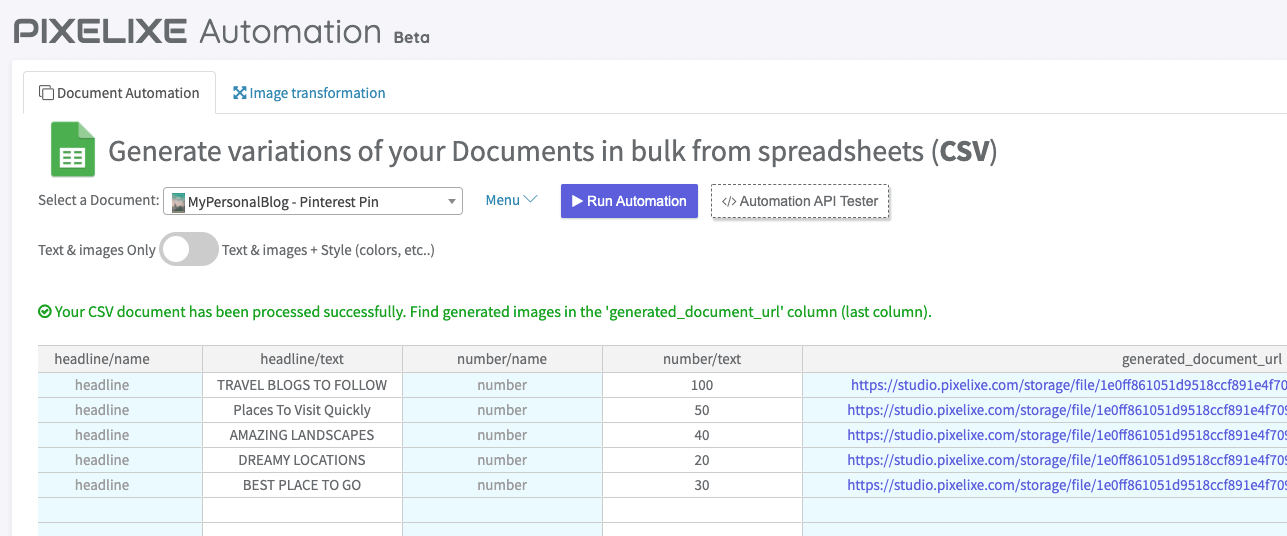
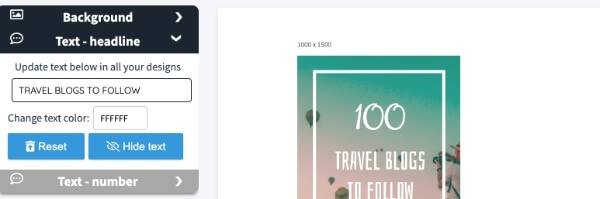
For example, opening the "Generate from Spreadsheet" menu will directly generate a ready-to-use spreadsheet where you will retrieve your custom labels (renamed elements) in blue. See below the generated spreadsheets. (Blue columns are automatically generated by Pixelixe and are not editable).

Another example for the Image Automation API, you can click on the "Automation API Tester" to let Pixelixe automatically generate the JSON Payload for you from the selected graphic template.
Finally, same principle for the design set builder, all template elements will be dynamically generated by Pixelixe to ease your work and increase your productivity.
3 - Send it to our Automation engine and voila!
Continue to understand how to run automation tasks by refering to one of the following documentation from the left menu:
- Spreadsheet Automation
- Design Set Builder
- Automation API
Getting Started - Spreadsheet Automation
Before jumping into this section, make sure to read the "Introduction" and "Getting Started - Commons" sections.
As you understood reading the "Getting Started - commons" section of the documentation, every text, image, colors within a document created with our editor can be updated in real time via Spreadsheet. Each row of the spreadsheet will generate a new image variation of your graphic
Access the Spreadsheet Automation dashboard
You can access the Spreadsheet automation from several interfaces within Pixelixe.
- Hovering the "Automate" button directly from the editor (top center toolbar).
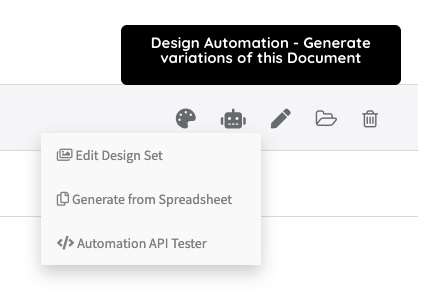
- From the "Your saved Documents" page hovering the graphic of your choice and then the "Robot" icon.
Ex: From "Your Saved Documents", move your mouse over any graphic and the graphic menu will appear on the right side of the screen.
How to use the Spreadsheet Automation dashboard ?
Opening the Spreadsheet Automation dashboard will look like the screenshot below:

As you can see, the first row of the spreadsheet is automatically filled in with all elements editable in your selected graphic. This first line is a model for you to reuse. You just have to focus on the creative part and copy/paste new rows depending on how many variations you want to create.
Keep in mind that the default generated spreadsheet is a light version that will let you update text and images only. For advanced users, it is possible to fill in the spreadsheet with even more customizable columns (such as colors, width, height, and more) by clicking on the following toggle button.
You will notice that the last column is called "generated_document_url"; this column is not editable and will be automatically filled with your variation URL when the automation process is over.

As the Color legend explains, in each column of the spreadsheet, the blue columns are not editable and correspond to all element names composing your graphic (you can change those element names using the editor anytime). On the other hand, the white columns are of course editable; this is where you can update the original content (text, image, etc.). By the way, do not hesitate to test changing a text or a photo and click on the "Run Automation" button to see how it works.
What does "default" stand for? How to update an image?
When you see the default label, it simply means that the automation engine will reuse the default image_url (the original image URL from your selected document). Of course, you can replace "default" with the image URL of your choice (starting by "http" and ending by "png", "jpeg", etc..). Be careful to use direct image URL and that you are not pasting a Google image URL for example.
How do I import/export the spreadsheet in another tool?
You can export the Pixelixe spreadsheet as a CSV file and import it again anytime. Be careful not to modify the element names outside of the Pixelixe UI. Indeed, with any other tools available on the market such as Microsoft Office or Google Sheets, you will be able to modify each column (even the blue ones) and the Pixelixe automation engine won't be able to recognize which element you want to update.
To export or import the spreadsheet, simply click on the "Menu" label located near the "Run Automation" button and click on either "Export CSV" or "Import CSV".

How do I save my Spreadsheet to edit it later?
To save your spreadsheet, simply click on the "Menu" label located near the "Run Automation" button and then click "Save CSV". A popup will appear asking you to choose a name for your spreadsheet. Follow the instructions from there.
To reopen your spreadsheet later, simply click on the "Open CSV" and double-click on the file of your choice in the list of saved CSV for your selected graphic.
How do I start the automation process?
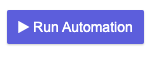
Click on the "Run Automation" button to start the automation process. A popup will appear asking you to save your CSV file. Follow the instructions from there.
Once the automation process will start you will see the following scree.
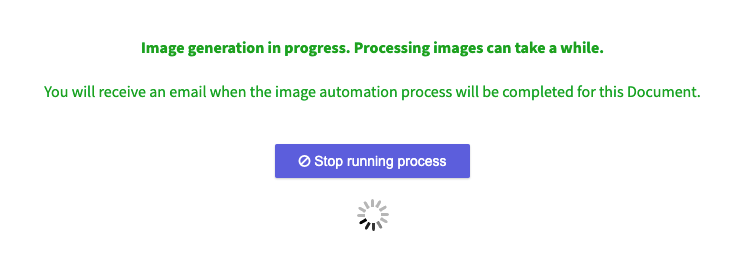
Feel free to either close your browser tab or to leave it open. Both ways, you will receive an email in your INBOX with a direct link to open generated images.
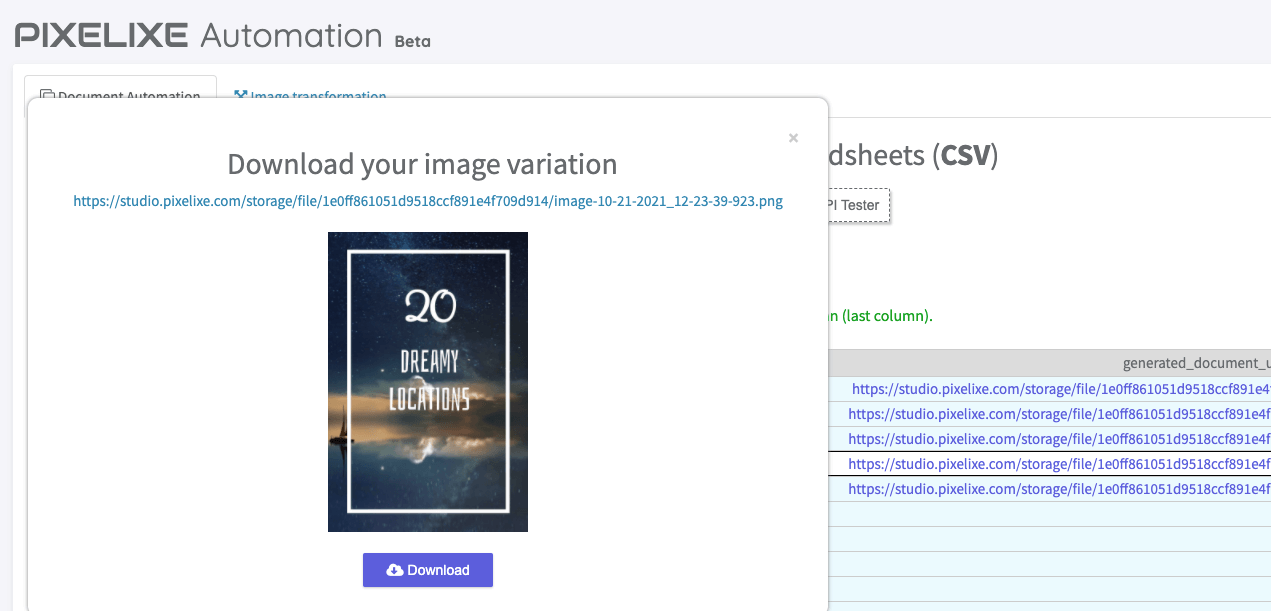
How to download generated images?
As soon as the automation process is over, click on the link you received by email or reopen the "Generate from Spreadsheet" menu for your graphic document and you will directly get the list of generated image URL in the last column of the spreadsheet (the column called "generated_document_url")
Simply click on the URL of your choice to see a preview of the generated image and download it.
Contact us if you have any question or issue during your automation.
Getting Started - Design Set Builder
Before jumping into this section, make sure to read the "Introduction" and "Getting Started - Commons" sections.
About Design Set Builder
Generate size variations of any graphic and update content all at once
As you understood reading the "Getting Started - commons" section of the documentation, every text, image, colors within a document created with our editor can be updated in real time via our Creative Automation platform. But you can do even more with the Design Set Builder and auto-generate multiple image size formats in one single place.
Our Design Set Builder is perfect to create an entire set at once from our UI dashboard. Once you added the size variations in your set, generate content variations all at once.
How to create a Design Set Builder ?
You can access the Design Set Builder automation from several interfaces within Pixelixe.
- Selecting a ready-to-use Design Set template from our template library.
- Hovering the "Automate" button directly from the editor (top center toolbar). Your graphic will become the "Source" document.
- From the "Your saved Documents" page hovering the graphic of your choice and then the "Robot" icon. The selected graphic will become the "Source" document.
Ex: From "Your Saved Documents", move your mouse over any graphic and the graphic menu will appear on the right side of the screen.
What does "Source" (SRC) document means?
IMPORTANT: Keep in mind that you can start a set from any saved graphic in your storage space. This graphic will become the "SOURCE" of your Set. This means that each time you will add a new size format to your set, our AI will automatically generate a size variation based on your source document. By the way, you can change the source document anytime from the left pane (Settings tab).
Let's consider the following graphic is our "SOURCE" document:

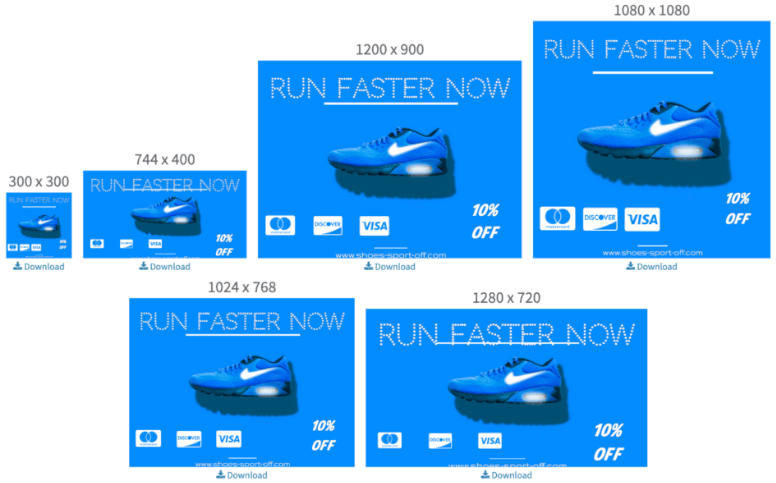
First, add size formats to your set
When you will create your first Design Set Builder, you will be asked to choose size formats from the following popup:
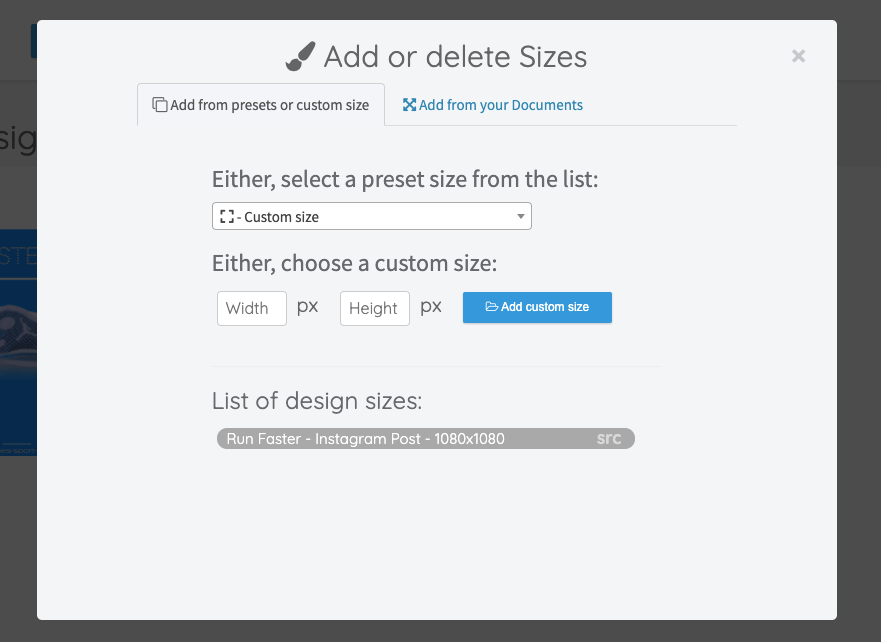
The preset size list will let you choose among a variety of known formats:
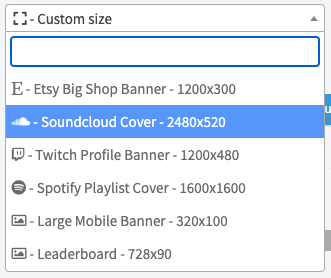
The default formats available are the following:
- Custom : Choose of course the size of your choice
- LinkedIn Post : 744 x 400
- Twitter Post : 1200 x 600
- Instagram Post : 1080 x 1080
- Facebook Post : 1200 x 900
- Youtube Thumbnail : 1280 x 720
- Pinterest Pin : 1000 x 1500
- Etsy Big Shop Banner : 1200 x 300
- Soundcloud Cover : 2480 x 520
- Twitch Profile Banner : 1200 x 480
- Spotify Playlist Cover : 1600 x 1600
- Large Mobile Banner : 320 x 100
- Leaderboard : 728 x 90
- Large Rectangle : 336 x 280
- Medium Rectangle : 300 x 250
- Half-Page Ad : 300 x 600
- Small Rectangle : 180 x 150
- Mobile Banner : 300 x 50
- Mobile Leaderboard : 320 x 50
- Wide Skyscraper : 160 x 600
- Skyscraper : 120 x 600
- Square : 250 x 250
- Small Square : 200 x 200
- Main Banner : 468 x 60
- Half Banner : 234 x 60
- Vertical Banner : 120 x 240
- Portrait : 300 x 1050
- Billboard : 970 x 250
- Large Leaderboard : 970 x 90
Keep in mind you can also add another saved graphic from your storage space from the "Add from your Documents" tab. This is useful to generate variations of several graphics simultaneously.
Anyway, once you added several size formats and closed the popup and you should see all your size formats already available in the center of the screen:
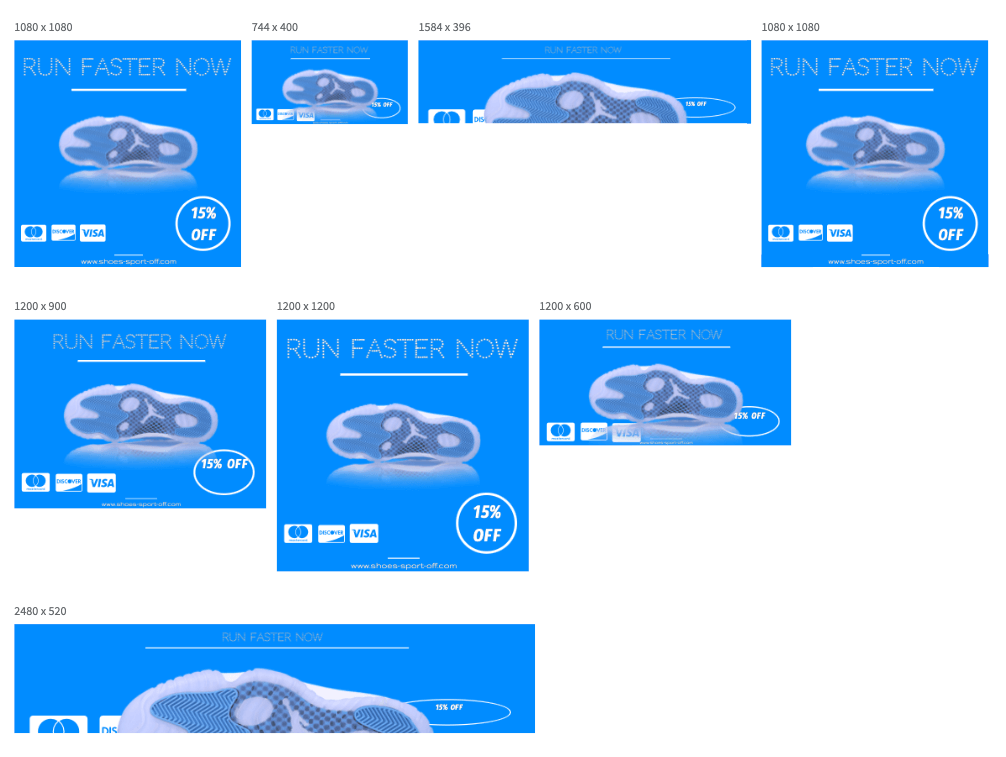
Those virtual graphics have been generated automatically by Pixelixe's smart resize algorithm. As you can see above, sometimes the generated graphic will be perfect and ready-to-use, sometimes, on the other hand some graphics won't be rendered properly. This is because dynamically resizing and relocating elements inside a graphic to match another format is a tricky and complex task to automate. Our algorithm will continue to learn over time though, we are making a lot of progress right now.
Anyway, all those generated graphics are first considered virtuals ("Virtual" means not stored in your storage space).
Of course, all those generated graphics composing your design set can be edited and fine-tuned anytime in the editor.
To edit a graphic, simply move your mouse over the graphic of your choice and you will find either:
- A Re-edit button
"Re-edit" means this is a graphic stored in your saved document and you can edit it directly from the set. (Ex: Your "Source" document is obviously stored in your saved document. - A First edit button
"First edit" means that as soon as you will edit and save this document, it will no longer be "virtual" and will be stored in your saved documents.
IMPORTANT
Deleting an existing graphic from your design set won't delete the document permanently. The document will still exist and be available from "Your saved documents" page.
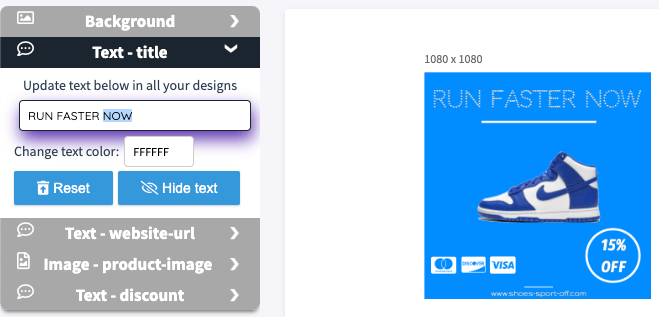
How to generate image variations of your designs ?
In the left pane, click on the "Design" tab (opened by default) and you will see a list of all the elements available in your "Source" document. Click on one of the item on the list and update the text or the image URL of the element.
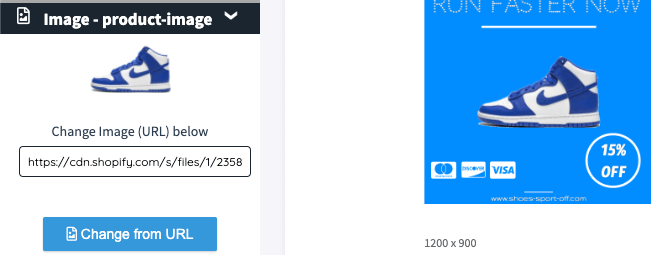
Changing content from the left pane will instantly update the content in all your image size formats all at once.
How to download generated image variations ?
Simply move your mouse over the "Download" button in the top toolbar and you will get a clickable list of all your graphic. Export from the Design Set can be as PNG, JPEG or HTML.
The Design Set Builder will continue to be improved and enriched by our team so do not hesitate to contact us to share feature requests or to get some help.
Getting Started - Automation API
Before jumping into this section, make sure to read the "Introduction" and "Getting Started - Commons" sections.
API Automation Tester
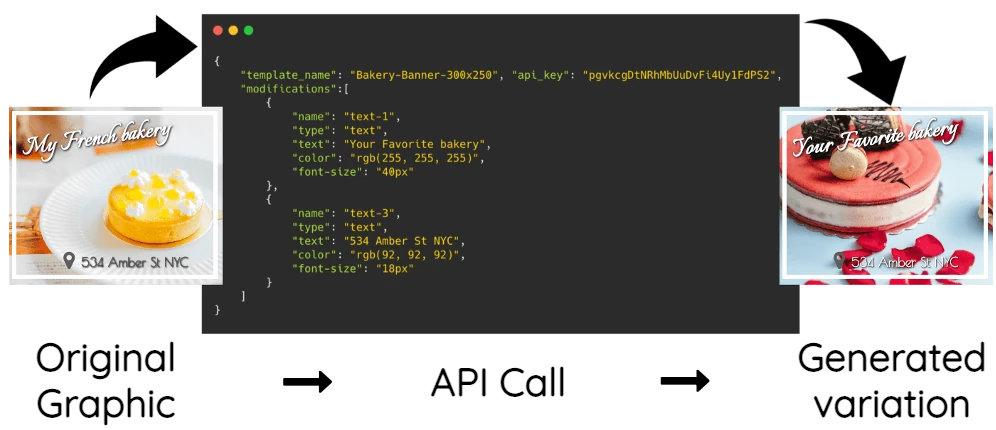
With the Image Automation API, keep in mind you can auto-generate images (PNG or JPEG), HTML, and also PDF documents.
As you understood reading the "Getting Started - commons" section of the documentation, every text, image, colors within a document created with our editor can be updated in real time via the API.
To save your precious time, we added a way to test the API for each of your graphics. This way, you don't need to manually create and test the JSON payload required to consume the API. Our API Tester will do the job for you.
You can open the API Tester from several dashboards in Pixelixe.
- From the "Automate" button within the editor (top center toolbar).
- From the "Your saved Documents" section hovering the graphic of your choice and the "Automation" icon.
- From the Spreadsheet Automation dashboard.
From the Automation API Tester, you can edit the generated payload and even send a request to the API and download the graphic variation.
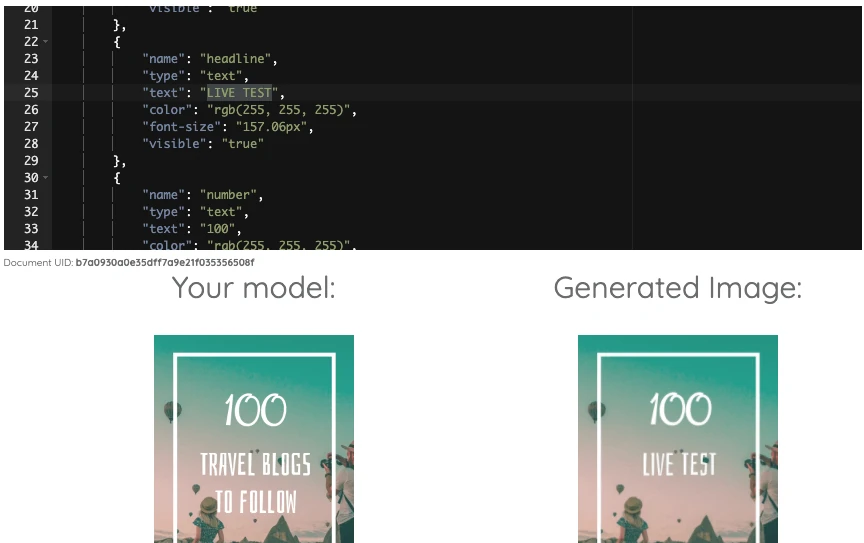
As you can see below, changing the original text "Travel blogs to follow" into "Live test" in the JSON payload returns the expected result.
To learn more about the API, read the technical API Documentation is available here.