API Documentation
Automated Image Generation API
For new subscribers joining Pixelixe after March 21th 2021, access the more recent V2 documentation here. For older subscribers, don't worry, this V1 documentation will remain supported and active indefinitely. Get more detail regarding the new V2 release and upgrade prerequisites here.
Pixelixe APIs enables you to auto-generate images such as social media visuals, ecommerce banners and more with a simple API.
Generate Infinite Images via API
Use our "Template Editor" to create reusable templates. Any graphics created with Pixelixe Studio can be automated. — now you're ready to generate marketing visuals!
Every text and image in a template becomes an object you can modify via API. Simply hit the Pixelixe API endpoint with your modification requests and in a few seconds an image will be generated for you.
Menu
- API parameters
- Code Snippets
- API Response
- Error Handling
- How to use Pixelixe webapp to create and manage reusable templates ?
API parameters
POST https://studio.pixelixe.com/api/graphic/automation/v1
| Parameter | Type | # | Description |
|---|---|---|---|
| json | string |
Required |
The json parameter must include the name of your graphic template you want to base your image generation on, your API key and an array of modifications you want to apply to your graphic. Ex: |
Sending the JSON payload to the automation API is similar to submitting an HTML form :
<form action="https://studio.pixelixe.com/api/graphic/automation/v1" method="post" >
    <input type="text" name="json" value="{'template_name': '...', 'api_key':'', ...}" / >
</form >
Code Snippets
fetch('https://studio.pixelixe.com/api/graphic/automation/v1', {
    method : "POST",
    body: '{ "template_name": "Demo-image-automation", "api_key": "6nm3JE0GoVWUai2wNEWiTLF66rk1", "modifications": [ { "name": "text-0", "type": "text", "text": "THIS IS" }, { "name": "text-1", "type": "text", "text": "A reusable Template" } ] }'
}).then(response => response.blob())
  .then(myBlob => {
        var reader = new FileReader();
        reader.readAsDataURL(myBlob);
        reader.onloadend = function() {
            var base64Image = reader.result;
            console.log(base64Image);
            document.querySelector("#generated-image").src = base64Image;
        }
  }).catch((error) => {
  console.error('Error:', error);
});
import requests
def main():
r = requests.post("https://studio.pixelixe.com/api/graphic/automation/v1", data={ "json": '{ "template_name": "Demo-image-automation", "api_key": "6nm3JE0GoVWUai2wNEWiTLF66rk1", "modifications": [ { "name": "text-0", "type": "text", "text": "THIS IS" }, { "name": "text-1", "type": "text", "text": "A reusable Template" } ] }'})
print(r.status_code, r.reason)
file = open("automated_image.png", "wb")
file.write(r.content)
file.close()
if __name__ == "__main__":
main()curl https://studio.pixelixe.com/api/graphic/automation/v1 -d 'json={ "template_name": "Demo-image-automation", "api_key": "6nm3JE0GoVWUai2wNEWiTLF66rk1", "base64": "true", "modifications": [ { "name": "text-0", "type": "text", "text": "THIS IS" }, { "name": "text-1", "type": "text", "text": "A reusable Template" } ] }'The API response
By default, the API will directly return the new RAW generated image (blob).
Another option is to return the new generated image encoded in Base64. To do so, add base64:"true" within the json document.
Ex:
{
  "template_name": "Baby-shower",
  "api_key": "afvkwxFgNSRuMbYoCvFi0UkMFPP1z",
  "base64": "true", ...
Optional: the API can return the variation as HTML (as an updated template), this way, you are free to re-edit those generated graphics within Pixelixe Studio or for example let your customers update them from the "white-label" editor integrated in your webapp.
Possibilities are endless!! To generate variations of editable graphic templates, add format:"html" within the json document. Just note, that this "HTML" option cannot be used with the base64:"true" parameter.
Ex:
{
  "template_name": "Baby-shower",
  "api_key": "afvkwxFgNSRuMbYoCvFi0UkMFPP1z",
  "format": "html", ...
Error handling
With no errors, the API will return a (200, 'OK') HTTP status code. If an error occurs, the HTTP response status code will be 400 and the response will be a JSON document with the following structure:
Ex:
{"status" : "error", "message" : "Bad or missing JSON (unexpected structure)"}| Error message | Status code | type |
|---|---|---|
| Bad or missing JSON (unexpected structure) | 400 | JSON |
| Missing JSON document | 400 | JSON |
| Bad JSON format (unexpected structure) | 400 | JSON |
| No template to generate image (template_name or template_url parameters missing) | 400 | JSON |
| Please provide your API key | 400 | JSON |
| No "ELEMENT_NAME" parameter found in the template. | 400 | JSON |
| Template not found | 400 | JSON |
| Not enough Credits to perform this request : "YOUR_CREDITS". Please, upgrade your account | 400 | JSON |
| Wrong API Key : API_KEY | 400 | JSON |
| An unexpected error occured. We will investigate this issue. Please, contact inquiries@pixelixe.com to get more detail. | 400 | JSON |
How to use Pixelixe webapp to create and manage reusable templates ?
1°) How to create reusable templates and test the API in one click ?
Any graphic created and saved with the "Graphic Editor" or the "Template Editor" can be used as a reusable template to automate and create unlimited variations of images.
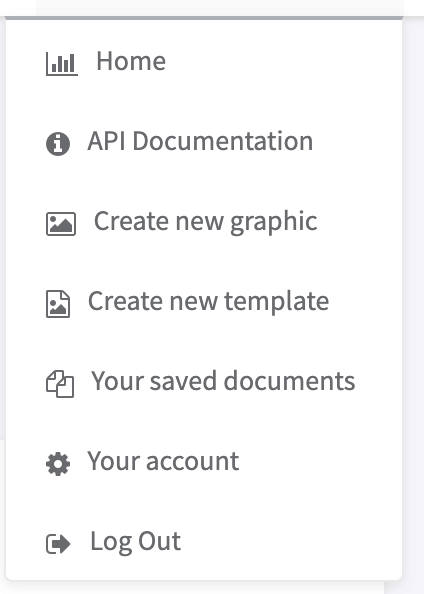
Once logged in into your Pixelixe account, click on the "PIXELIXE Image Automation API" section or you can also click on the "Create new template" from the top right dropdown menu. Both ways work!
You will automatically be redirected to our "Template Editor". From there, create your first template choosing content from our collection of more than 2.000.000 professional photos, images, icons and font families.
N.B: Each time you add an element on your canvas, you can change the name of your element at the top of the right side panel. This is useful to know what element you want to automate variations using the API.
Once you finish, click on the "Save & Test Automation of this template" button from the top toolbar.

This will save your template and redirect you directly to the Image Automation API Tester.
2°) How to test image generation based on any graphic and template from the "Saved documents" section ?
Click on the "Your Saved documents" menu from the dropdown menu to access the list of your saved graphics & templates. As mentioned before, every document can be automated.
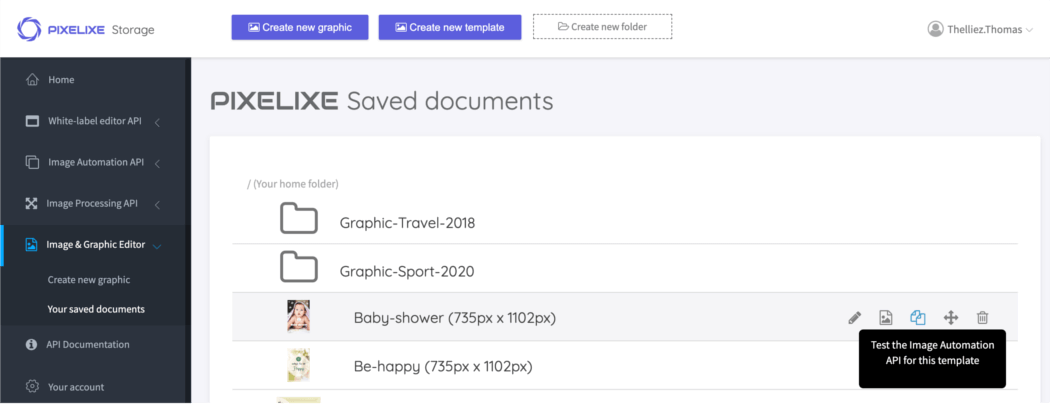
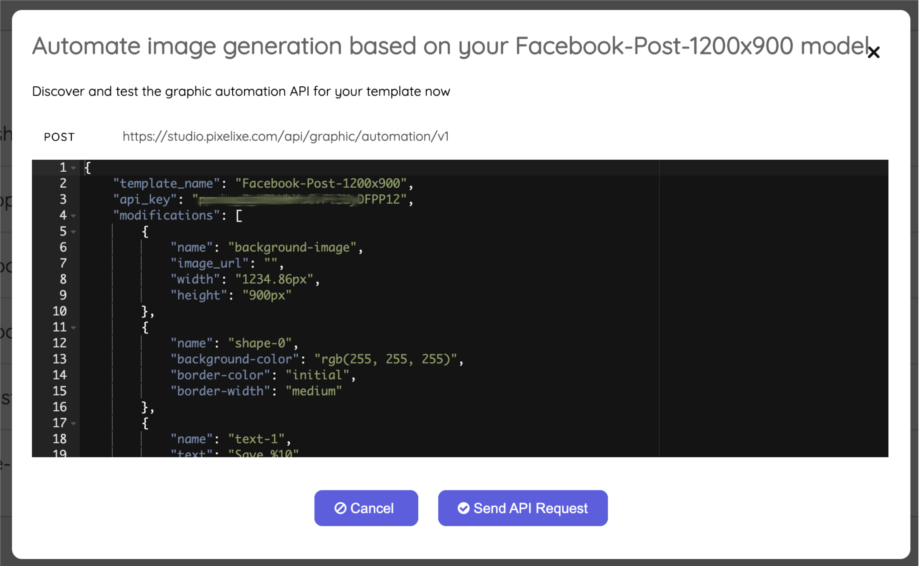
Move your mouse over a graphic and click on the button corresponding to the following tooltip "Automate image generation based on this model".
A pop up will open and display the JSON document required to send modifications demand to the API. You can tune the modifications section of the JSON directly into the popup to generate variations of your image.
Once you are happy with your template, you are free to duplicate this JSON document to ease your API integration process.