Building complex web applications is not easy. Especially when you do not have any technical background. Somehow, during the last few years, we have seen a lot of new products and startups on the market launching from no-tech founders. Indeed, a lot of NoCode tools are emerging and they allow almost anyone to build awesome solutions and platforms without writing a single line of code. One of the leading platforms available is called Bubble.io.
Bubble is particularly easy to use and allows users to create web apps without coding. Simply using drag and drop and some settings. Don’t worry, their documentation is complete and the platform comes with a handful of plugins to integrate a variety of external tools and API.
Today, we are going to showcase how our white label photo editor can be fully integrated into a bubble app without writing code and without any particular bubble plugin.
If you are interested to learn more about Bubble, you can also read our last article describing how to automate image generation from your app with Bubble.io API Connector
Both Image Automation and Photo editing are our flagship tools and are used by a lot of our builder users.
How to set up Pixelixe white label photo editor
As you might already know, Pixelixe offers a graphic creation and automation toolkit. Providing amazing Banner generation and Graphic creation solutions are our core activities since the beginning of the Pixelixe story.
When we started Pixelixe, the first product we built was our Photo and graphic editor and we are still improving it today. This editor is called “Pixelixe studio” (a free version is available directly at https://studio.pixelixe.com/), all the other features we developed and added so far are natively integrated with this Pixelixe Studio.
Since the beginning, we received a lot of requests from our user base to integrate all or parts of our editor into their website. Therefore, we decided to make it possible for users to add their logo, choose their colors and their favorite features and embed an editor in their website or web app. By the way, all the customization does not require writing code at all.
So, to summarize, our white label solution allows anyone to integrate a top-of-art image editor in their website with different integration scenarios.
For example:
You can decide to let your users create a graphic or document from scratch.
You can open a photo directly and let your users edit their photos (adding photo effects, resizing, cropping, etc..)
You can create custom templates and offer them to your customers.
Etc….
In the end, once they have finished editing their design, as soon as they click on the customizable call to action button, you can decide in the solution settings whether you prefer to receive their designs on your server (HTTP POST), or receive them by email or even to not receive edited graphics at lot but letting users downloading their creations directly from the editor.
Anyway, integration possibilities are endless and we made sure that they will cover all your project’s needs.
If you would like to learn more about our white label solution, we strongly invite you to check our landing page dedicated to our white label photo editor and also our online demo.
Set up your Pixelixe White Label editor in a few click
From your Pixelixe account, click on the “Integration / API “ menu and then on the “White Label Settings” submenu from the left panel. Then, from the following screen, you will be able to follow the 3 steps to set up everything you need.
Step 1 - Customize Your Editor
Click on the “Open the Customization tool” option to get started. You will access our standard editor plus a white panel on the right side of the screen. From this panel, you can upload your logo, change the clickable logo URL, update all colors of each menu and panel of the editor without writing a single line of code. Some menus can be disabled as well to perfectly match your requirements.
Step 2 - Choose your integration workflow
This is where you can define what should happen when your users will have finished editing their graphic. 2 options are available:
Allow graphics download directly from the editor
Redirect my users back to my website after each design
Click on the checkbox of your choice and this is it.
Then the second question is :
Do you want to receive graphics created by your users in real-time?
3 options are available:
I don’t need to receive my user’s creation.
Post graphics, in real time, to my web server (WebHook)
Send the edited graphics to my email INBOX (Convenient for NoCode integration into Zapier, Integromat, etc..)
In our case, in this blog post, we want to showcase how your Bubble app can receive edited graphics in real-time, so check the second option. As soon as you check the checkbox, you will see a text field asking for your webhook URL.
The webhook URL is where Pixelixe will send edited graphics in real-time as soon as your users have finished editing a photo.
The webhook URL must be a bubble.io app server endpoint. You will see a bit later in this article how to get the webhook from your Bubble app.
Step 3 - Integrate your editor with an iframe
This step can seem technical, but you will see it is not at all. We built an easy-to-use interface to generate the HTML code you need to copy/paste into your website (or in our case, Bubble.io).
Simply, try our options (iframe URL parameters) to fully understand the possibility of your integration. If you are a technical person, fee free to check out our online documentation, you will see that there are a lot of options there:
https://pixelixe.com/docs/v2/#create-or-update-a-document
Let’s stop talking about Pixelixe for now, at some point later, it will be required to copy the generated HTML code (iframe code) into Bubble but let’s look at the Bubble setup first.
How to set up your Bubble.io backend workflow to receive edited photos
From your Bubble account, from your home dashboard, start by selecting (or creating) the app of your choice.
The first thing to do is to update your App Settings to allow iframes and enable workflow API.
As you can see from the screenshot below, you must check the “Enable Workflow API and backend workflows from the API tab in the settings section (from the left side menu).
Once checked, you can click on the “General” tab and select “Allow all iframes” from the dropdown named “Allow to render the app in a iframe/iframe (X-Frame-Options) -> See screenshot below.
Perfect, your Bubble account has the right settings. Now, let’s start the integration.
To do so, click on the main search bar located at the top left corner of your screen and select “Backend workflows” from the dropdown menu (See screenshot below).
Once you select “Backend workflows”, you will be automatically redirected to the “Workflow” section of your app and you will see a button “Click here to add a backend workflow”. Click on it and select “New API Workflow” (see screen below):
Fill in the form to complete your API backend creation:
Select the “Expose as a public API workflow” checkbox.
Select “This workflow can be run without authentication” checkbox.
Choose the API workflow name of your choice.
Select “Detect request data” from the “Parameter definition” option.
And finally select “JSON Object” as the default “Response type”.
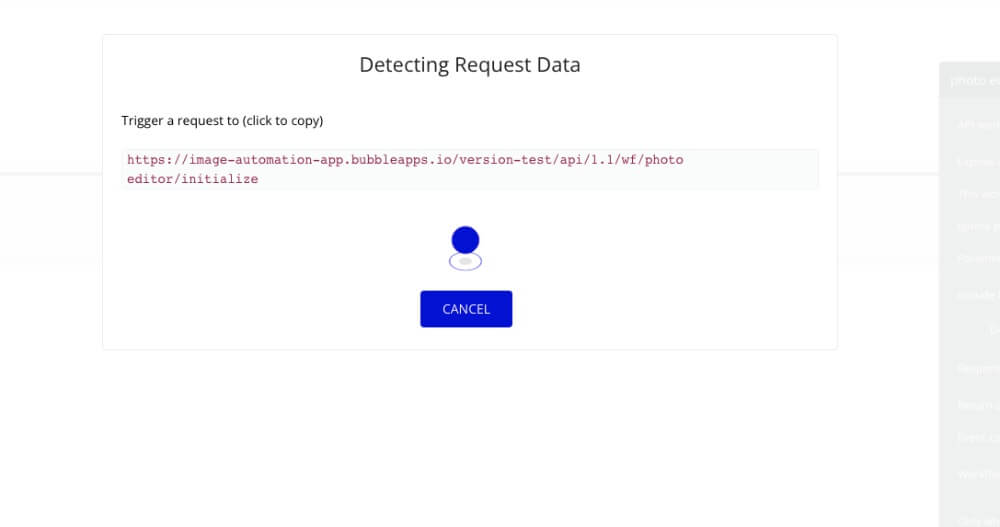
Click on the “Detect Data” button and Bubble will start waiting for a request from Pixelixe to automatically detect the parameters sent by Pixelixe.
WARNING: This won’t work with the free version of Bubble. Only paying subscribers can detect request data. It is important to know this because you will see it is not obvious. Bubble will reject the detection but you won’t see any message to tell you that something is wrong.
As you can see from the image above, Bubble asks you to trigger a request to a specific URL.
This URL is the famous webhook URL requested by Pixelixe earlier in this POST.
Therefore, it is important that you go back to your Pixelixe “White Label Settings” in the second section to copy/paste this URL as an answer to the “- Do you want to receive graphics created by your users in real-time?” question.
As a reminder, this webhook URL is where Pixelixe will send edited graphics in real-time as soon as your users have finished editing a photo.
Do not forget to save changes clicking on “Save your integration settings”.
Perfect, now, it is time to simulate a user who finishes editing his photo.
Go to the third section of Pixelixe settings called “Integrate your editor into your app” and simply click on the link as shown on the bottom of the following screenshot. This will allow you to open your customized editor in a new tab from your web browser and play with it.
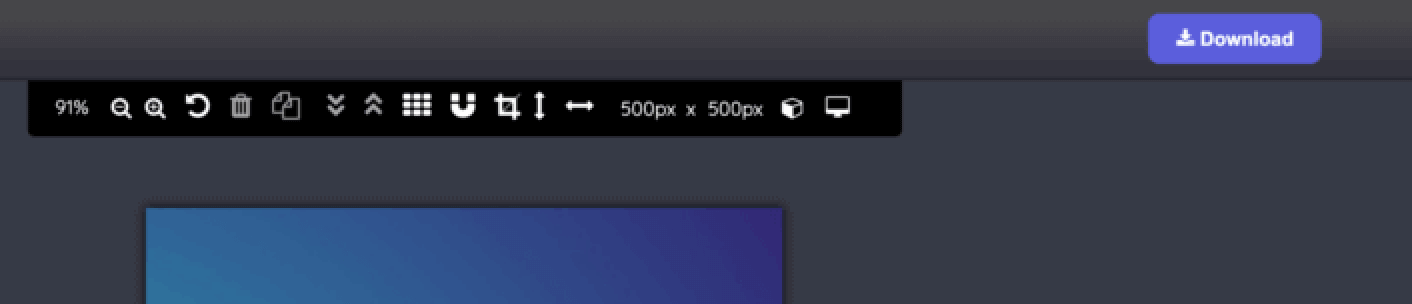
Once your studio is open, click on the actionable button located at the top right corner of the editor. Clicking on this actionable button (called “Download” by default) will trigger the request on the Webhook URL you configured sending to your Bubble app the requested JSON Payload it is waiting for.
By the way, you may have noticed that the label of the actionable button can be changed from the customization tool.
If you go back to your Bubble app tab, if your Bubble app was still listening to detect data, you will get the following screen.
If yes, perfect, this means that Bubble.io successfully detected the image sent in real time by your customized editor. You can see that in the JSON Payload sent to the Bubble Webhook (Workflow API), you can get the user unique ID, name, width and height of the created graphic and 3 URLs to access to the graphic in PNG, HTML or PDF and more parameters.
Once your Bubble app Workflow accesses those parameters, you are free to continue building your business workflow and trigger other actions as soon as your app receives a graphic from Pixelixe. Cool, right?
How to integrate the editor into one of your Bubble app’s page
The last thing we need to do is to embed the User Interface into one of your app pages. To do so, select the page of your choice from the top left main search bar and go to the “Design” menu.
As soon as the UI Builder appears, search for the “HTML” component (see screenshot below)
And drag it to the location of your choice in your page layout. A pop up will open and in the Appearance tab, you will see a big text area with a sample HTML text (Ex: edit me…”).
This is where you must paste the HTML code (iframe code) generated by Pixelixe earlier.
Also, check the “Display as an iframe” option. Check the “This element is visible on page load” option. And finally, the minimum width must be 99%.
Keep in mind that the size of your iframe must be as large as possible to provide the best user experience to your user. Editing graphics and photos is a complex task that requires a lot of panels and toolbars.
You will notice that the Pixelixe editor won’t display correctly from the UI Builder. This is normal because Bubble app UI Builder does not authorize iframe to send and receive remote data. Therefore, your customized editor will remain stuck with the infinite loading bar.
To test if your integration was successful, simply click on the “Preview” button from the top right side of the app builder.
Here is the result, the editor will load exactly where you placed it.
Conclusion
Here it is, we successfully integrated a white label version of Pixelixe photo editor into a Bubble app without writing a single line of code. And the cherry on the cake, a ready-to-use backend workflow has been set up to let you process edited images if you need to.
I hope this tutorial/article has been helpful for you. Do not hesitate to contact us anytime if you are following those steps and that it does not work out for you. It will be a pleasure to help.